Traveling through the social media stratosphere is my favorite way to find instant inspiration. Today I'm sharing a few sites I visit regularly and why.
http://alisaburke.blogspot.com/
Alisa
Burke is an artist who never ceases to inspire me. Her creativity is
infectious and downright fun. She documents her artistic life via
Instagram and on her blog. I check it every day! A few years ago I was
lucky enough to take one of her classes in Chicago and it definitely
left me wanting more.
http://blog.birdfromawire.com/
I recently found this blog and Jen the author is funny, genuine and extremely talented. Her tutorials are easy to follow as is her writing style. If you are looking to use wire in your artwork, and I encourage you to do so, please check her out.
http://www.iheartnaptime.net/
"I heart naptime" has been in my reading repetoire for a few years. I found Jamielyn via Pinterest of course and have noticed we have similar tastes in cooking and crafts.
http://www.shugarysweets.com/
And yes, I have to include a foodie website. Her recipes and links are beautiful and yummy. I've made several of them and they all turned out wonderful.
Enjoy perusing them and I'll bet you add them to your blog/website reading lists too.
Have a great day all and let your creative soul out.
Shari

Friday, February 19, 2016
Wednesday, July 8, 2015
Grandma's Pattern Books

As my mom sifts through Grandma's house and trinkets, she came across these two sweet pattern books.
The first book has the patterns to make a cloth book for little hands and minds to "read" and learn.
The vintage crocheted fashions for fashion dolls AKA Barbie and friends bring back so many memories from my childhood. Seriously I had several hand crocheted outfits made by grandma in my doll collection.
Both of these books are so sweet and in excellent condition. A fantastic addition to the family collection as we all do some sort of crafting!
Tuesday, May 26, 2015
Make your own Jewelry?!
 |
| Beads, wire, and a crochet hook to make a gorgeous necklace to match an outfit! |
 |
| Some wire, some beads, and a lovely little bracelet appears. |
 |
| Pearls...It's so frothy, isn't it? |
Saturday, May 23, 2015
Bravo4Freida Art FUNdraiser

On June 14th, we'll be creating collage masterpieces to fund raise for Freida's Service Dog, Bravo! Come join us. I am very excited to be supporting this great cause. Tell your friends. Bring your friends. Register here.
Thursday, May 21, 2015
Upcycled Icons -- Heros
 |
| My grandfather is my personal HERO. |

 |
| The giving power of "As You Wish". (What movie is this fabulous quote from?) |
Tuesday, April 21, 2015
What do you do with your stash?

 We all have odd bits in our arts and crafts stash that we know we are going to use...someday. These items jump to my attention when I'm looking for something else.
So over the weekend I puttered around the studio looking for new inspiration. While I didn't discover the next big technique or gadget, I did use some of those little bits from my stash.
My basic crochet skills came to play as I made a soft glitzy bracelet from several black and silver yarns and some black pony beads. It is stretchy so no clasp needed. It shines and of course goes with most of my wardrobe. This little project took me less than 30 minutes. I have some bright colored yarns that will made a great bracelet like this one.
Go look in your stash and see what you come up with? Then share it with us here in the comments or on Instagram tagging me at @wilsonshells and #stash #reuse.
Wednesday, April 1, 2015
Spring is here...sort of

It's Spring and I need to see some flowers. So since they aren't quite visible yet here in the Chicago area...I made my own to enjoy!

I started a flipagram on making this particular flower. The only part that I didn't include is gluing the layers together. Easy to do. Stack the layers - largest to smallest - and add some glue between each layer. Any craft glue will work. Check it out.
http://flipagram.com/f/S60sUvB01x
Tuesday, March 10, 2015
Spring is in the Air! A New Wreath and Class

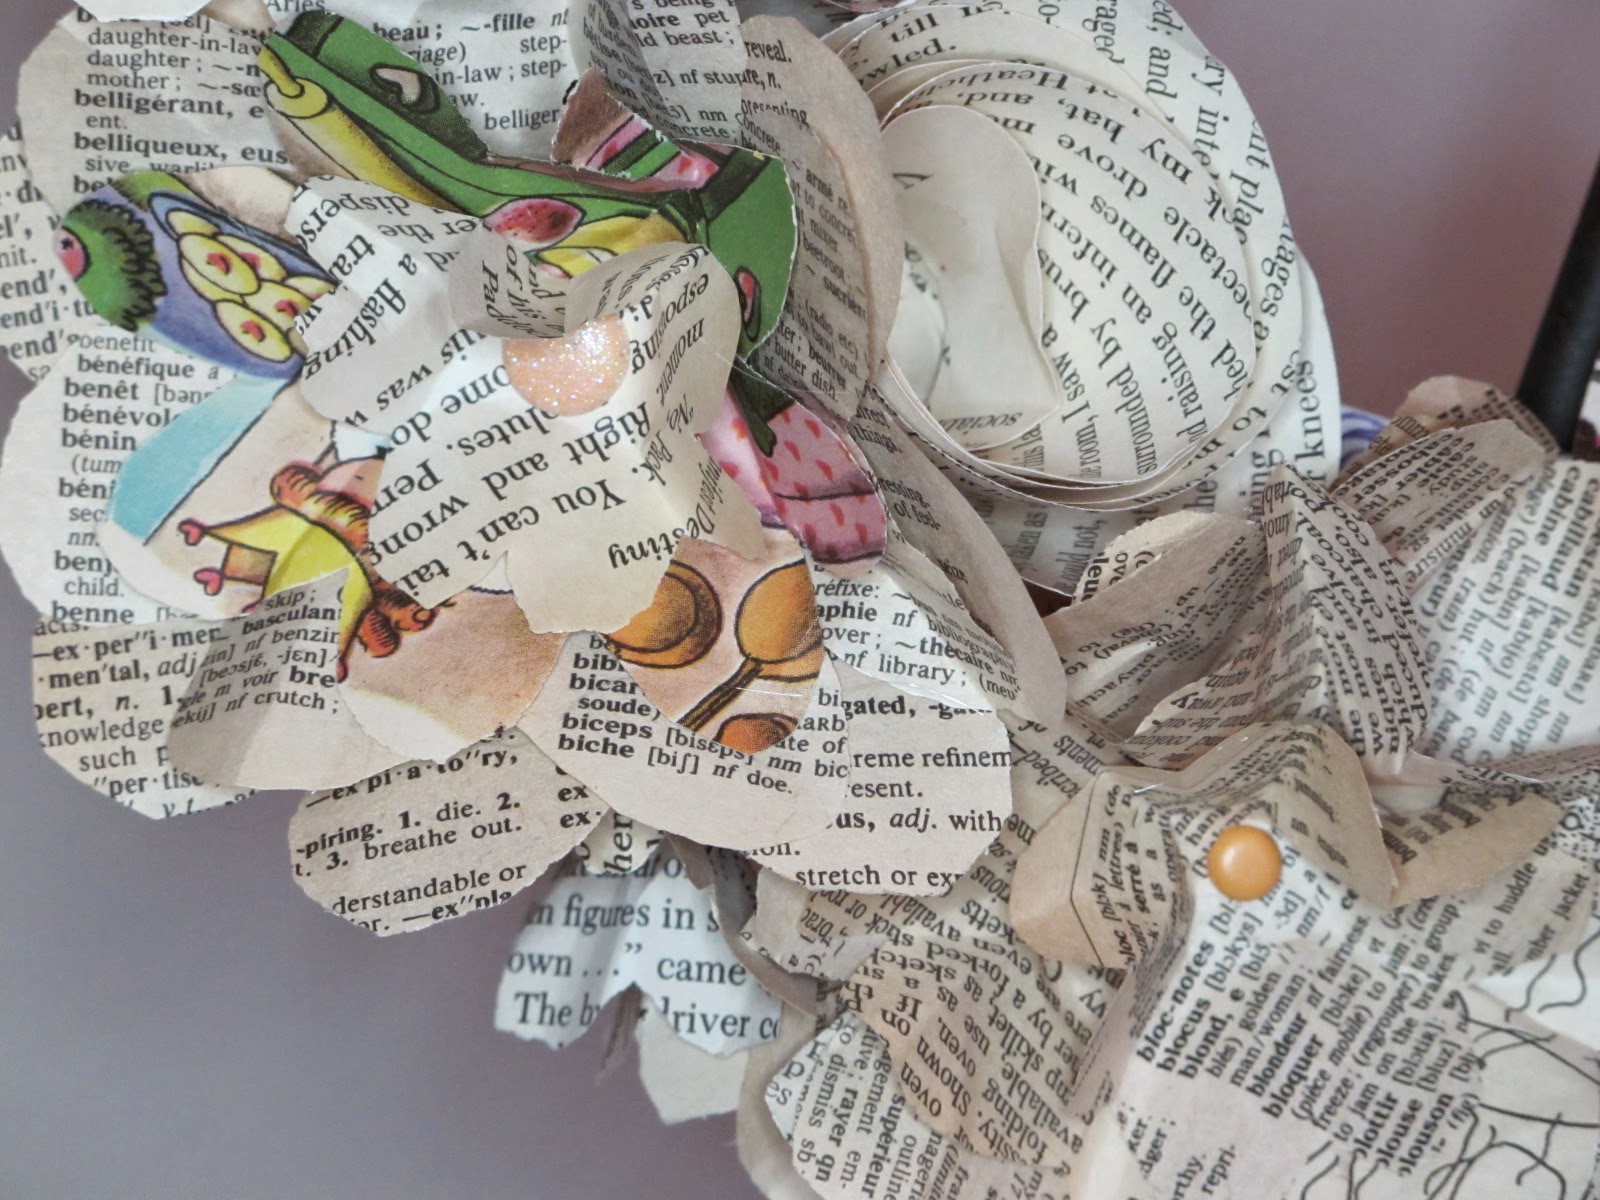
 My newest book page wreath uses several different books including dictionaries, fiction novels, and children's books. I started making rolled flowers and folded/cut flowers. No rhyme no reason. Just making flowers that were pretty.
 The rolled flowers are easy to make and require little effort. When making them out of paper, you do need to have a glue gun or glue dots available to hold the centers in place but otherwise they are simple rolled spiral cut circles. For a great tutorial, check out Joanne B at Splitcoast Stamping/.
The "crumpled" flower are even easier.

 Use square pieces of paper -- any size -- I was using 4" squares for the bigger "petals". Fold one in half, then half again to make a square. Then fold the folded edge towards the two folded sides forming a triangle. Remember when we made paper snowflakes as kids? Same folding. Then cut a little heart shape from the folded side to the two folded sides. Unfold the "flower".
 You will make 4 petals like this for each flower. Stack them and push a scrap-booking brad through all layers and secure. You now have a flat 4-layer flower. Starting with the top layer, crumple it around the brad, then do the same to the 2nd, 3rd and 4th layers around all of the layers before it. Simply loosen the crumpled petals from around the brad and Voila! a flower. Attach it to your wreath with hot glue.
Using pages from children's books, really adds color and texture. Any paper will work - explore your collection. Go on and do it.
Wednesday, March 4, 2015
Sweet Pennant Flags & DYI
 A friend asked me to make a pennant to hang in her daughter's room. So I thought I'd document the project and process. It does require using a sewing machine but all straight stitches!

Each pennant flag is approximately 5.5" wide and and 7" long and double sided (two different fabrics). Make your own template to cut out the triangles. I used 8 different fabrics to make a 175" pennant string. Pick two different flags and pin them together (back of fabric together). Run a straight stitch about 1/2" from the edge of the two long sides.
 Using your pinking sheers trim a bit off each side to give some texture. To assemble the pennant string, I used .75" twill
tape folded over the open/top edge of each flag, stitched down, to
string them together. Just line up each flag side by side on the twill
tape as you sew.
Using your pinking sheers trim a bit off each side to give some texture. To assemble the pennant string, I used .75" twill
tape folded over the open/top edge of each flag, stitched down, to
string them together. Just line up each flag side by side on the twill
tape as you sew.Now hang it up! Isn't it adorable? Wouldn't this look great in any little girl's room? But wait, what if you make other fabrics that reflect your little boy's favorite things? So cute!

Voilá! The finished and hanging pennant. Isn't it adorable? According to her mom, the little girl who sleeps under it, points to it when people come into her room. I think she likes it too.
Monday, March 2, 2015
Special Session -- Your Passion -- Your Career

Join us as we explore the power
of a Renaissance Soul and what it can do for YOU! Learn how to focus on your passions The
Renaissance Way. You will discover how
easy it is to identify and articulate your heart’s desires.
After this workshop, you will
feel fully empowered and at ease to live as the swan you are meant to be and
not as a duck. Here is more of what you can expect:
1.
Gain clarity in
which direction to focus on to achieve the success you desire.
2.
Discover the
values and beliefs that are limiting and in your way
3.
Visualization
exercises to get you on your right track.
(meditation & vision board)
4. Develop a manageable step-by-step
plan of action honoring your talents, interests, and passions.
5. Interactive activities to explore how
to have a JOB compliment your passion pursuits.
6. How to eliminate the competition
between a JOB and your passion.
7. How to focus when faced with multiple
choices.
8. Design a personal creative
Renaissance visual journal as your map to following your heart’s desires
9. Gain insight on the myths keeping you
from living and embracing your uniqueness.
10. Be inspired and motivated that “yes you can.”
Facilitators: Theresa
Maria Napa, CPCC, LOACC, Certified Career Coach & Shari Pontillo, Owner of Twisted Fiber Studio.
Subscribe to:
Posts (Atom)